Mini gioco in Unity | CUBEavoid
CUBEavoid è un minigioco realizzato in Unity. Di seguito il codice sorgente e la configurazione.
L'obiettivo è quello di evitare il cubo piccolo ridimensionando il cubo grande con il cursore del mouse.
Passaggio 1: creare tutti gli script necessari
- Crea un nuovo script, chiamalo SC_PlayerCube.cs, rimuovi tutto e incolla al suo interno il codice seguente:
SC_PlayerCube.cs
using System.Collections;
using System.Collections.Generic;
using UnityEngine;
using UnityEngine.UI;

public class SC_PlayerCube : MonoBehaviour
{
    //Assign enemy mesh renderer
    public MeshRenderer enemy;
    public Text gameOverText;

    Transform thisT;
    MeshRenderer mr;

    //Global static variable
    public static bool GameOver = false;

    // Start is called before the first frame update
    void Start()
    {
        thisT = transform;
        mr = GetComponent<MeshRenderer>();
        gameOverText.enabled = false;
    }

    // Update is called once per frame
    void Update()
    {
        if (GameOver)
            return;

        if (gameOverText.enabled)
        {
            //Game has resumed, disable game over text
            gameOverText.enabled = false;
        }

        //Scale player cube with mouse movement
        Vector3 playerScale = (new Vector3(Screen.width / 2 - Input.mousePosition.x, 1, Screen.height / 2 - Input.mousePosition.y)).normalized * 10;
        //Keep Y scale at 10
        playerScale.y = 10;
        //Limit minimum X and Z scale to 0.1
        if (playerScale.x >= 0 && playerScale.x < 0.1f)
        {
            playerScale.x = 0.1f;
        }
        else if (playerScale.x < 0 && playerScale.x > -0.1f)
        {
            playerScale.x = -0.1f;
        }
        if (playerScale.z >= 0 && playerScale.z < 0.1f)
        {
            playerScale.z = 0.1f;
        }
        else if (playerScale.z < 0 && playerScale.z > -0.1f)
        {
            playerScale.z = -0.1f;
        }
        thisT.localScale = playerScale;

        //Check if enemy have intersected with the player, if so, stop the game
        if (mr.bounds.Intersects(enemy.bounds))
        {
            GameOver = true;
            gameOverText.enabled = true;
        }
    }
}- Crea un nuovo script, chiamalo SC_EnemyCube.cs, rimuovi tutto e incolla al suo interno il codice seguente:
SC_EnemyCube.cs
using System.Collections;
using System.Collections.Generic;
using UnityEngine;

//This script controls enemy cube AI
public class SC_EnemyCube : MonoBehaviour
{
    //Private variables
    Camera mainCamera;
    float movementTime = 0;
    Vector3 startPoint;
    Vector3 endPoint;

    // Start is called before the first frame update
    void Start()
    {
        //Get camera tagged "MainCamera"
        mainCamera = Camera.main;
        GenerateStartEndPoint();
    }

    //Assign start and end points slightly outside the Camera view
    void GenerateStartEndPoint()
    {
        Vector3 relativeStart;
        Vector3 relativeEnd;

        //Randomly pick whether to go Left <-> Right or Up <-> Down
        if (Random.Range(-10, 10) > 0)
        {
            relativeStart = new Vector3(Random.Range(-10, 10) > 0 ? 1.1f : -0.1f, Random.Range(0.00f, 1.00f), mainCamera.transform.position.y);
            if (relativeStart.y > 0.4f && relativeStart.y < 0.6f)
            {
                if(relativeStart.y >= 0.5f)
                {
                    relativeStart.y = 0.6f;
                }
                else
                {
                    relativeStart.y = 0.4f;
                }
            }
            relativeEnd = relativeStart;
            relativeEnd.x = relativeEnd.x > 1 ? -0.1f : 1.1f;
        }
        else
        {
            relativeStart = new Vector3(Random.Range(0.00f, 1.00f), Random.Range(-10, 10) > 0 ? 1.1f : -0.1f, mainCamera.transform.position.y);
            if (relativeStart.x > 0.4f && relativeStart.x < 0.6f)
            {
                if (relativeStart.x >= 0.5f)
                {
                    relativeStart.x = 0.6f;
                }
                else
                {
                    relativeStart.x = 0.4f;
                }
            }
            relativeEnd = relativeStart;
            relativeEnd.y = relativeEnd.y > 1 ? -0.1f : 1.1f;
        }

        //Convert screen points to world points
        startPoint = mainCamera.ViewportToWorldPoint(relativeStart);
        endPoint = mainCamera.ViewportToWorldPoint(relativeEnd);

        //Reset movement time
        movementTime = 0;
    }

    // Update is called once per frame
    void Update()
    {
        //Game over, wait for click
        if (SC_PlayerCube.GameOver)
        {
            //Click to resume
            if (Input.GetMouseButtonDown(0))
            {
                SC_PlayerCube.GameOver = false;
                GenerateStartEndPoint();
            }
            else
            {
                return;
            }
        }

        //Move enemy from one side to the other
        if(movementTime < 1)
        {
            movementTime += Time.deltaTime * 0.5f;

            transform.position = Vector3.Lerp(startPoint, endPoint, movementTime);
        }
        else
        {
            //Re-generate start / end point
            GenerateStartEndPoint();
        }
    }
}
Passaggio 2: configurazione
Dopo aver creato i 2 script principali, procediamo con la configurazione del gioco:
- Crea una nuova scena se non l'hai ancora fatto
- Seleziona la telecamera principale, modifica la sua posizione in (0, 10, 0) e la sua rotazione in (90, 0, 0)
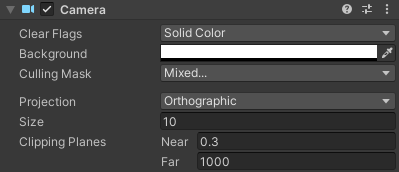
- Cambia le proprietà del componente Telecamera della Telecamera principale: Cancella Flag su 'Solid Color', Sfondo su 'white', Proiezione su 'Orthographic' e Dimensioni su '10'
- Crea un nuovo cubo (Oggetto di gioco -> Oggetto 3D -> Cubo) e assegnagli un nome "Player"
- Cambia la posizione "Player" in (0, 0, 0) e la scala in (10, 10, 10)
- Crea un nuovo materiale (fai clic con il tasto destro del mouse sulla cartella Progetto -> Crea -> Materiale) e assegnagli un nome "PlayerMaterial"
- Cambia lo "PlayerMaterial" Shader in Unlit/Color e cambia il suo colore in nero

- Assegna "PlayerMaterial" al cubo "Player"
- Duplica il cubo "Player" e rinominalo in "Enemy"
- Cambia la scala "Enemy" in (0,7, 0,7, 0,7)
- Duplica "PlayerMaterial" e rinominalo in "EnemyMaterial"
- Cambia il colore esadecimale "EnemyMaterial" in 157EFB
- Infine, assegna "EnemyMaterial" al cubo "Enemy"

Creiamo un'interfaccia utente semplice:
- Crea un nuovo testo UI (Oggetto di gioco -> UI -> Testo), rinominalo in "GameOverText"
- Assicurati che l'allineamento RectTransform per il nuovo testo sia impostato su Centro medio
- Imposta Testo Pos X e Pos Y su 0
- Cambia l'altezza a 100
- Per il componente Testo, imposta il testo sottostante (assicurati che la proprietà Rich Text sia selezionata):
Game Over
<size=15>Click to Try Again</size>- Imposta la dimensione del carattere su 25
- Imposta l'allineamento del testo al centro
- Imposta il colore del testo su rosso

Infine, assegniamo gli script:
- Seleziona il cubo "Player" e assegnagli lo script SC_PlayerCube
- Assegna il cubo "Enemy" alla variabile Nemico
- Assegna "GameOverText" alla variabile Game Over Text

- Seleziona il cubo "Enemy" e assegnagli lo script SC_EnemyCube
Ora, premendo Play, il cubo blu dovrebbe iniziare a muoversi sullo schermo. Per evitare questo, bisogna ridimensionare il cubo nero utilizzando il cursore del mouse.
Sentiti libero di migliorare questo gioco in qualsiasi modo.